
I spent last week working on a music video for a competition. Here is the finished product, which was for PV NOVA’s “Evolution of Get Lucky” remix:
I am pretty pleased with it, I had to rush the editing for the deadline but I had enough time to perfect the futuristic scanline effect I am sharing here.
So without further ado, for this tutorial you should have:
- A basic understanding of blender composite nodes
- A basic understanding of render layers
- A rendered scene to work with, which will ideally be bright with plenty of contrast. I think black backgrounds work particularly well.
Here is a frame from the render before applying the effect (This particular scene is rendered with freestyle in Blender Internal but some other scenes use emitter materials in cycles):
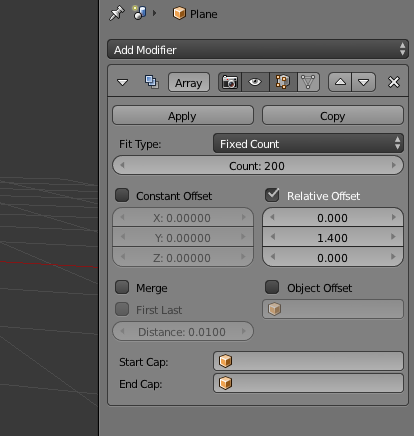
Add an array modifier, with a 1.4 relative offset in the z direction. A count of 200 should be enough for now:
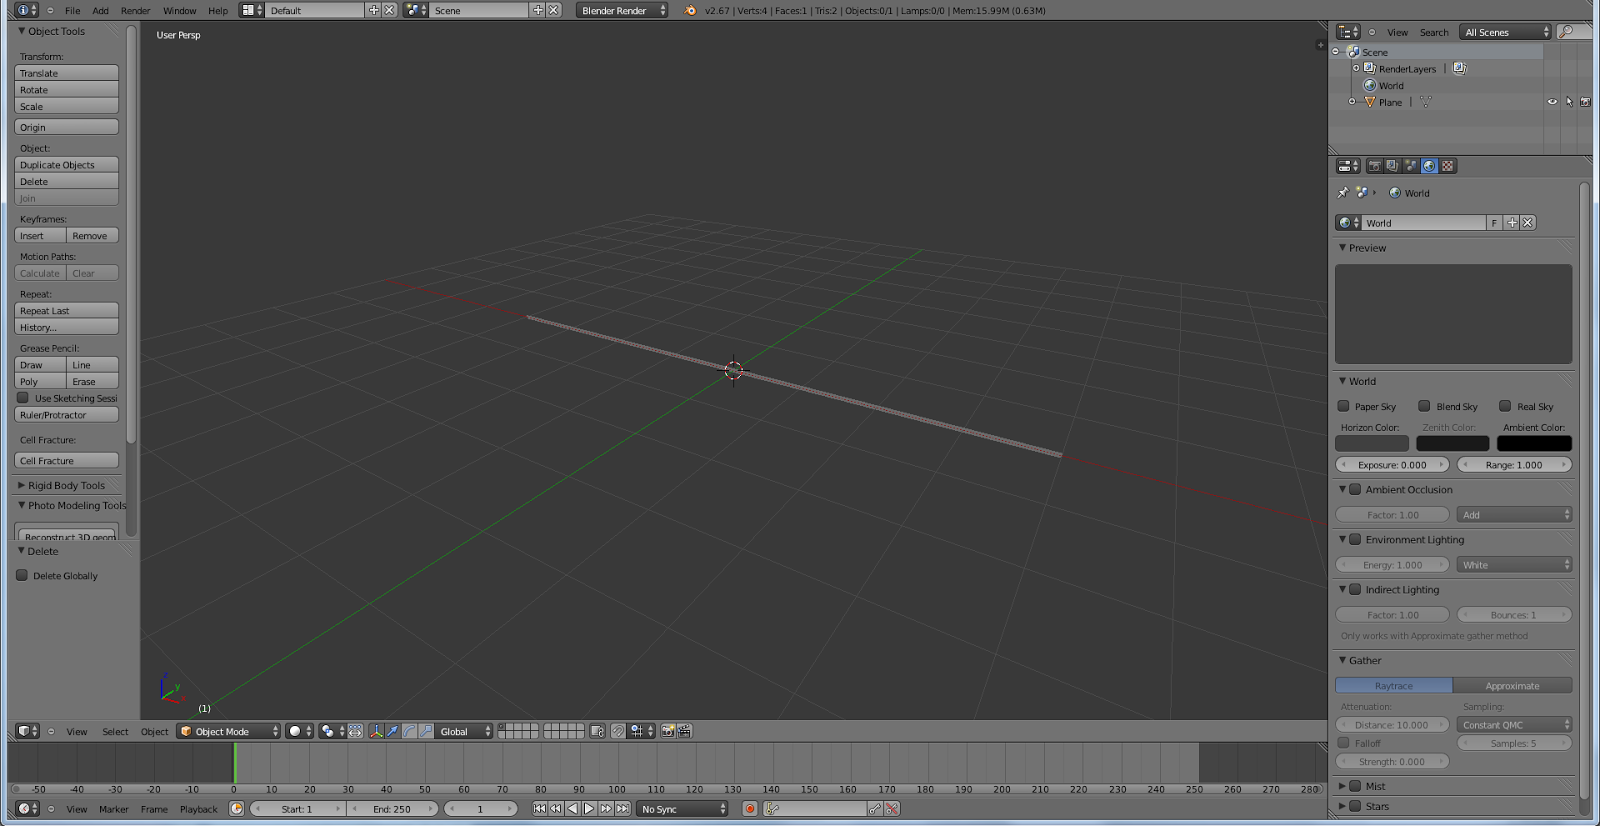
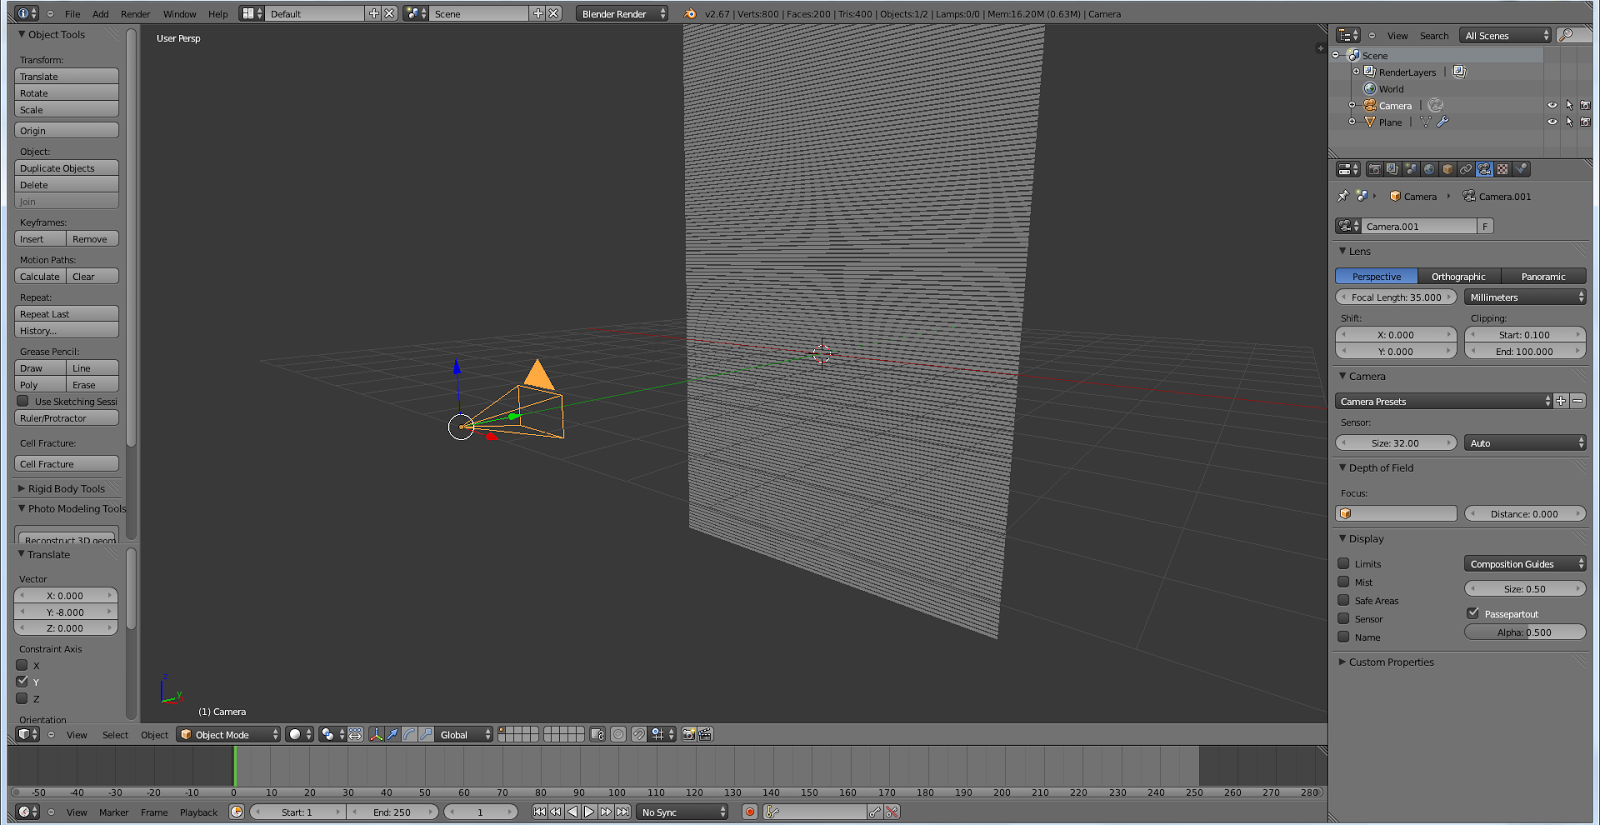
Move these down 5 in the z direction. Now clear the rotation and location of the camera by selecting it and pressing Alt-R and Alt-G respectively. Rotate it 90° in the x axis and move it in the y direction about 5 units. This is what your scene should look like now:
Now in the camera data tab, make the camera orthographic. The way the camera looks should change:

In the world tab make the horizon white:

Doing a quick test render now by presing F12 should give you this:

Now, in the render layers tab name the current layer “lines” and select the current scene layer:

Create a new layer, call it “Noise” and assign it to layer 2:

Go to layer 2 in your scene and create another plane, scale it up 8 times and rotate it 90° on the x axis. Add a sun lamp, rotate it 90° in the x axis, and move it -10 in the y direction. Set the power to 5.
Now select the plane you just created and create a new material for it, which will be called “noise material”. Increase the intensity of “diffuse” to 1 and make the colour pure white. Decrease the intensity of “specular” to 0.

Now in the texture tab, create a new one and set the type as noise. Set the default colour to black and select “negative”:

We are now finished with render layers! Let’s get to the interesting part.
Now split the main 3d window into another for compositing. You can drag down the top right corner:

And in the new window select “Node Editor”:

Select the node editor type, and tick “use nodes”:

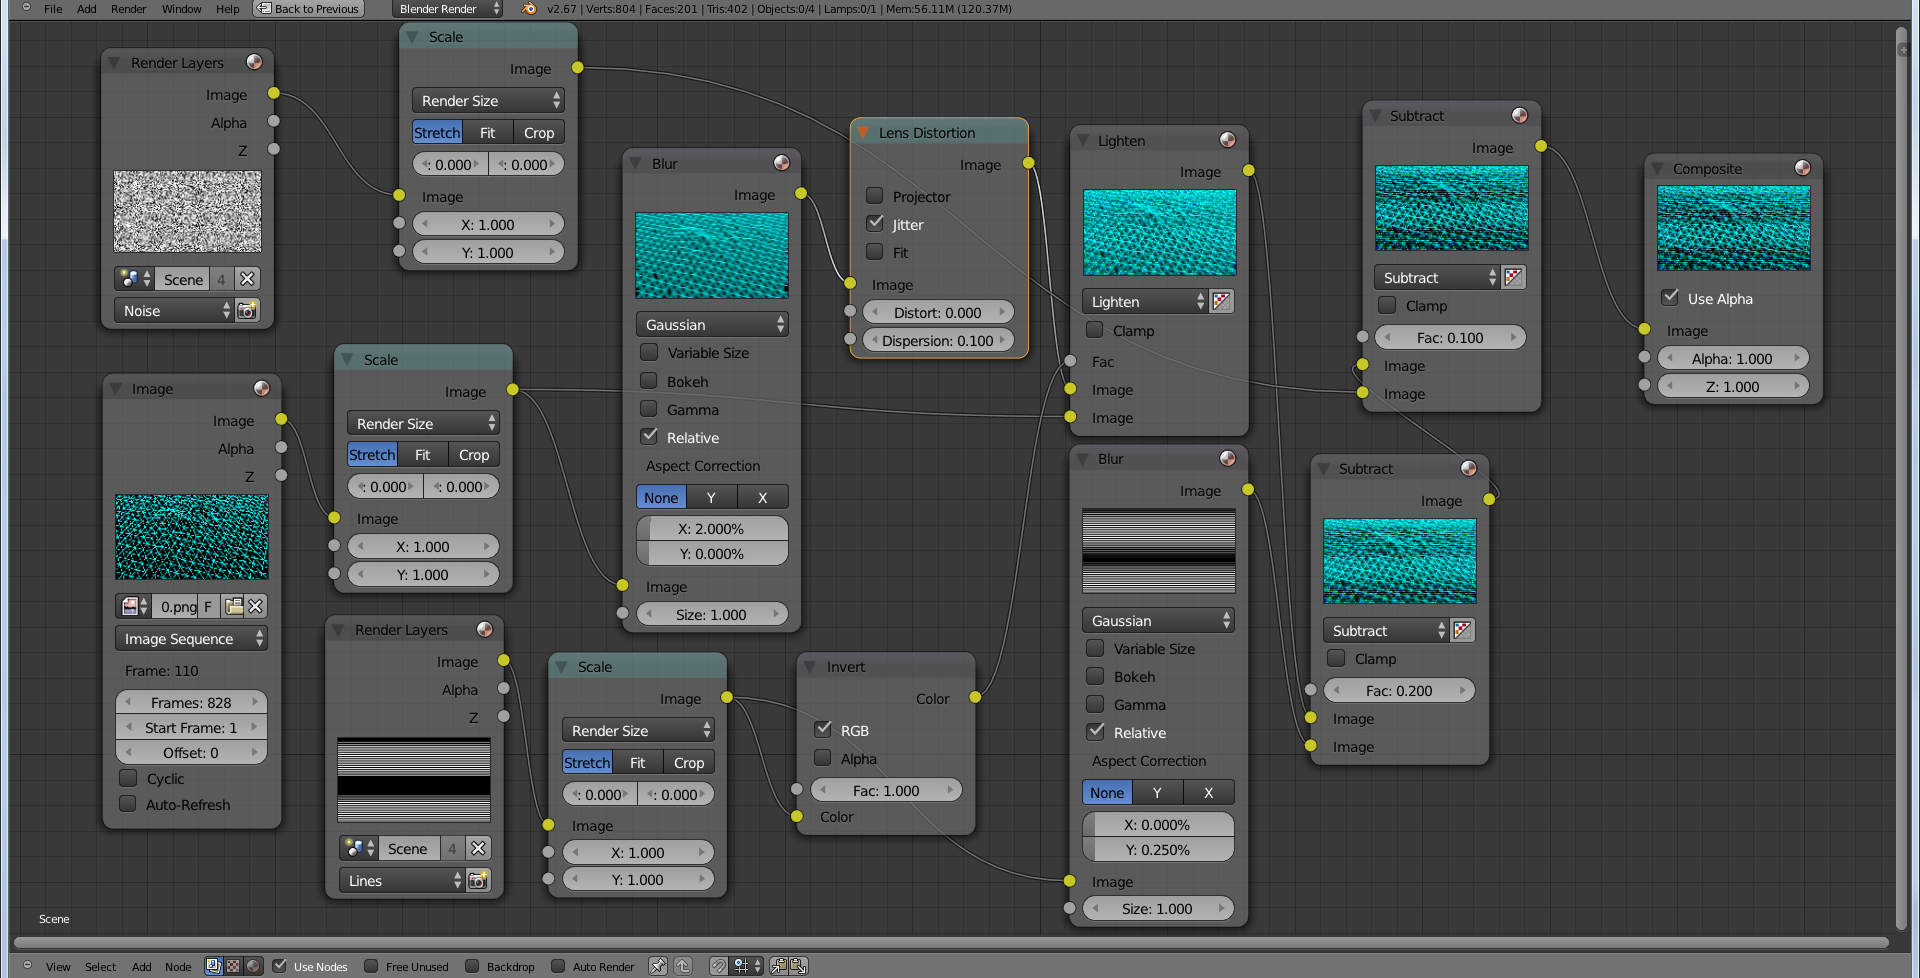
You can now essentially copy my node setup:

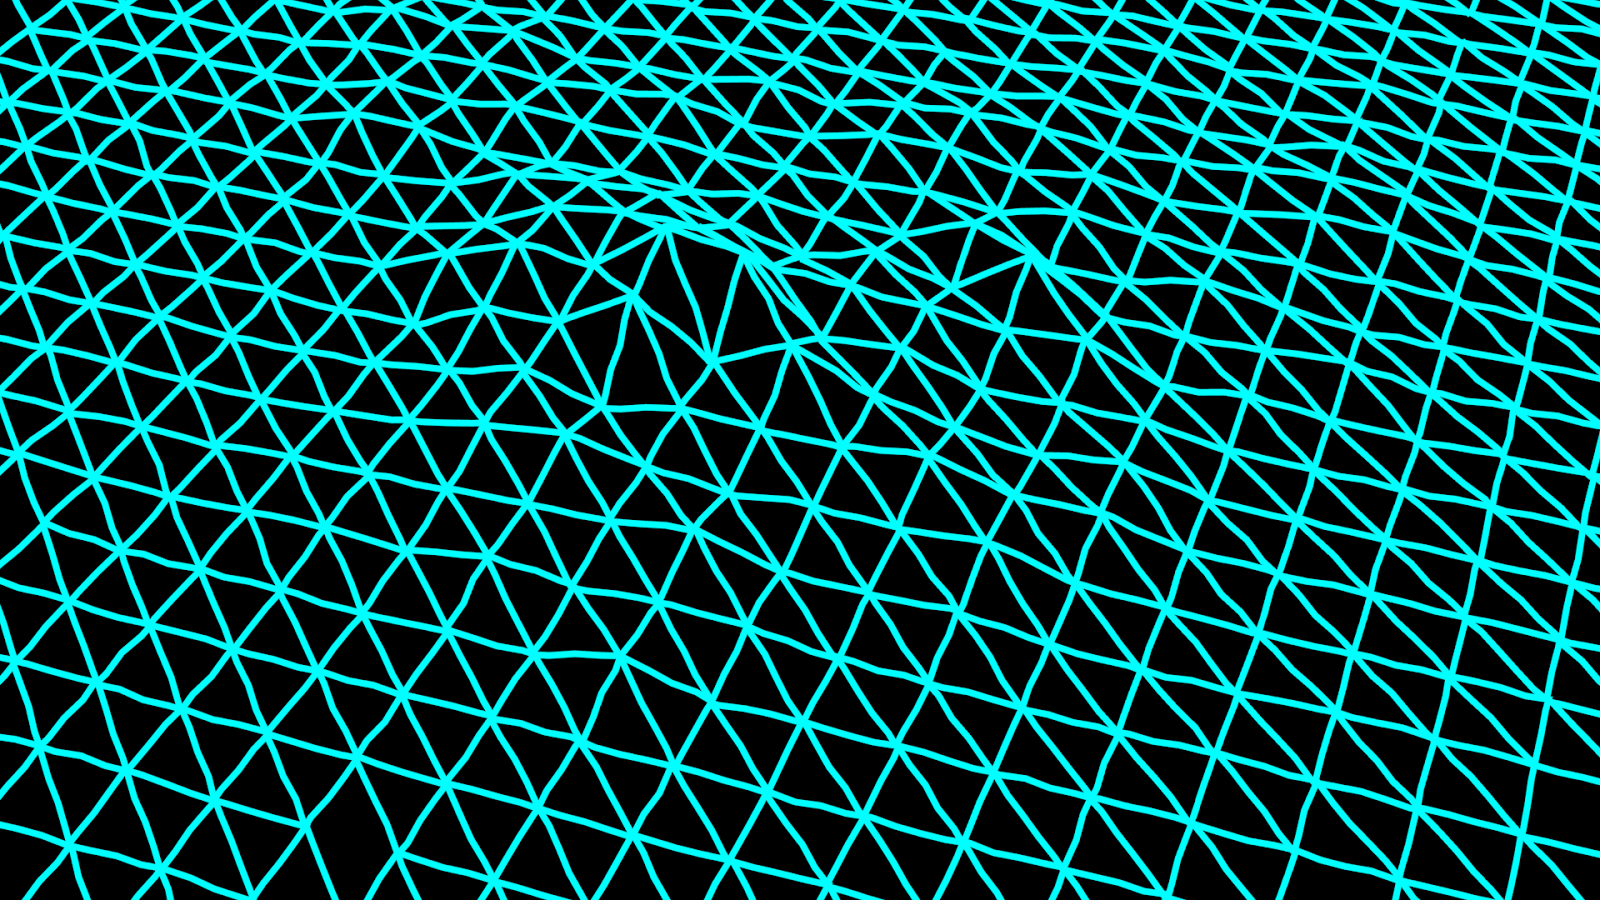
The rendered lines from earlier will selectively blur parts your input, and then selectively eliminate the parts in between. The “noise” from layer 2 will add a layer of noise to the image which looks boring without it. A render now will look something like this (make sure you’ve selected both scene layers before hitting F12):

First I would just like to encourage you to mess around with the values I have given. Changing the distance in the array modifier changes the distance between the scanlines, and most numbers in the compositor can be safely changed to subtly alter the look of the finished product.
Now to achieve the variation in the video, I varied the widths of the lines in layer 1 and key-framed the whole thing to move down to give that scanning effect. To vary the noise I added random movement to the plane in scene 2. This should be pretty straightforward but please let me know if you would like detailed instruction on how to do it.
Well done on getting all the way to the end, thanks for reading!
Thanks go out to Windmill for his inspiration and sharing with me his method of achieving this effect.