If you’ve ever used Blender for animation, the chances are that you’ve used the graph editor. It’s an invaluable tool and Blender’s is more flexible than the alternatives in many other 3D packages. It allows you to do a lot of great things like bake sound to an animation for music visualisations, but it’s got a great feature that I hardly hear talked about. Here it is:
Graph Modifiers
Once a keyframe is added to an object (by simply pressing I and and selecting what you would like to keyframe), the “modifiers” option magically opens up in the graph editor to the right of your graph. If you don’t see it, hit N to open up the properties toolbar.
You might be wondering what this does? Well as it turns out, a lot. Hitting “add modifier” gives you a list of possibilities. I’m going to talk about the ones I regularly use here, which help me create anything from an oscillating motion and looping GIFs, to perfectly smooth movement.
Generator
Put simply, generator generates a graph. If you remember your y = mx + c from school, the default view will make sense. You can also use equations where y is any expanded polynomial function of x (i.e. it is a + bx + cx^2 + dx^3 …. ) by changing the “poly order” number. For example, you might use a square relationship like this one below to animate something that accelerates smoothly.
This is the modifier I use to get a smoothly moving camera in perfect loops where the camera moves. But bear in mind this won’t use any higher power of x. All you’ll need to do is change the value written before x in the default view.
Built-In Function
Built In Function allows you to use some other functions, with the same level of control. The most common use is to generate waves, and can allow you to do things like animate perfectly looping camera wiggle, among many other things. The options easy to understand:
- Amplitude dictates the size of the waves
- Phase multiplier controls the frequency
- Phase offset changes the starting point of the wave
- Value offset makes the waves centre on a value other than 0
Envelope
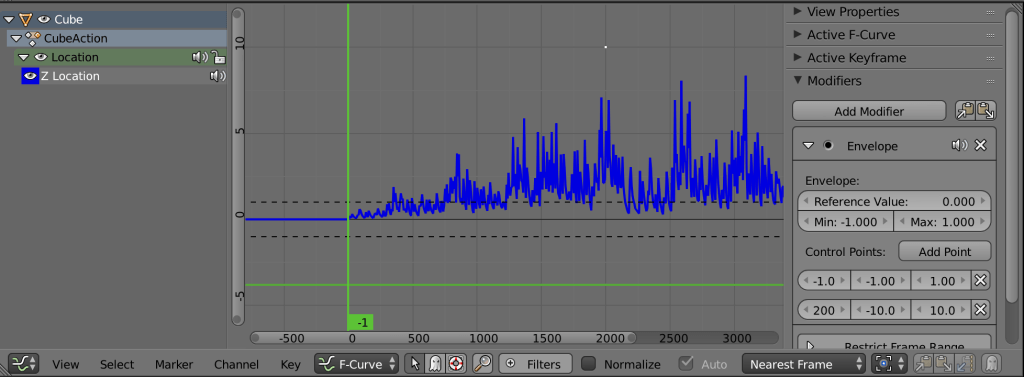
Envelope is a great tool for helping you shape other graphs. For example you can apply it after baking a sound to an f-curve to change the amplitude, which can even be modulated with time.
For almost all uses, the reference value and min and max below it can be left as they are. The magic happens when you add “control points” which distort the reference values to the new numbers. In other words, the old min and max become the new min and max defined in the control point (the middle and right columns, respectively).
The column on the left is the frame which you want the control point to act on – and if you want to influence the whole timeline in the same way this can be left on its own. The only time you would change it is if you wanted the envelope to change with time, as I demonstrate above.
Other Options
Those are the three modifiers that I find myself using on a regular basis, and here are some options you’ll find on most modifiers.
Blend Mode
By default, adding a modifier will replace your existing graphs and keyframes, but clicking the “additive” button will add it to any previous ones instead. This is perfect if you want to combine multiple modifiers.
Restrict Frame Range
“Restrict Frame Range” is an option you’ll see on all modifier, and it only lets the graph take effect over a certain range. The top two variables are start and end frames, and “in” and “out” decide how many frames to use to fade this modifier.
Thanks for reading! I hope you found this useful. If you have any questions, or want to share what you came up with using a graph modifier, feel free to share in the comments below.


Pingback: Blender Graph Editor: Modifiers()
Pingback: Didacticiels | Pearltrees()
Pingback: NewHindi Songs Lyrics 2016()